
Les 3 minutes Analytics – Comment manipuler un node de configuration dans KNIME ?

Bienvenue ! Encore une étape à franchir avant de devenir un KNIME Expert. Dans ce parcours des 3 Minutes Analytics, vous poussez plus loin vos analyses avec des nodes plus complexes.
Pour rappel, Les 3 minutes Analytics sont une série d’articles sur le blog Mydral consacrée à la plateforme KNIME.
Aujourd’hui un tutoriel très complet pour savoir manipuler un node de configuration. C’est parti !
 Mydral vous propose également de découvrir en vidéo ce tutoriel :
Ce tutoriel est donc destiné à comprendre comment manipuler un node ou noeud Configuration dans KNIME.
KNIME propose plusieurs nodes de configuration.
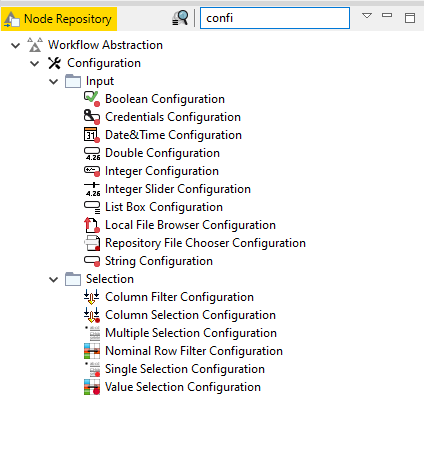
Ils servent à configurer vos workflows, métanodes et de permettre aux utilisateurs de faire des exécutions sur le serveur.
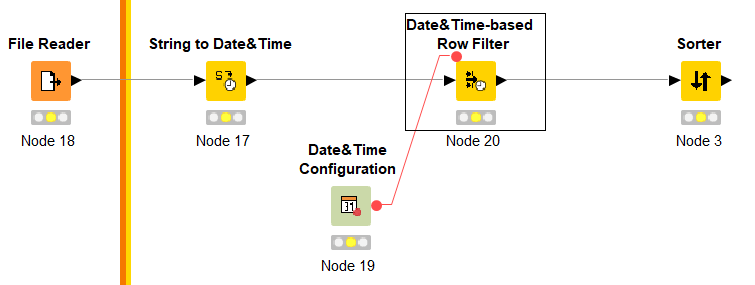
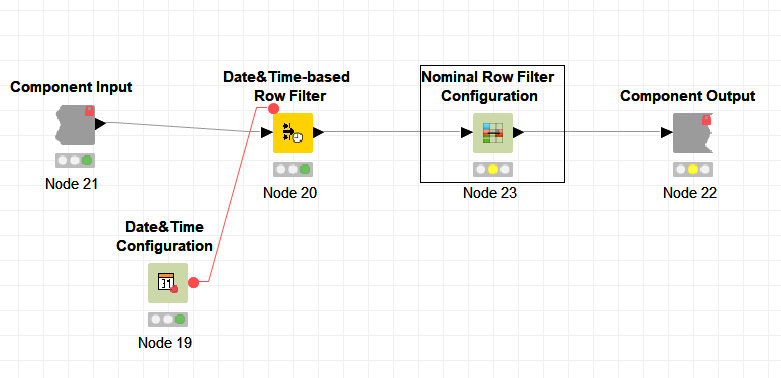
Dans cet exemple, je vais ajouter un composant qui va permettre à l’entreprise Sport-up d’observer ses commandes par région selon les dates données.
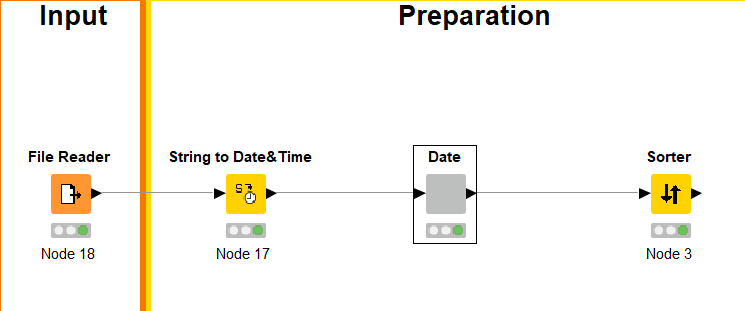
Pour cela, je vais sélectionner le fichier concernant les commandes avec File Reader, mettre la colonne Order date au format Date&Time au lieu de string avec le node String to Date&Time.
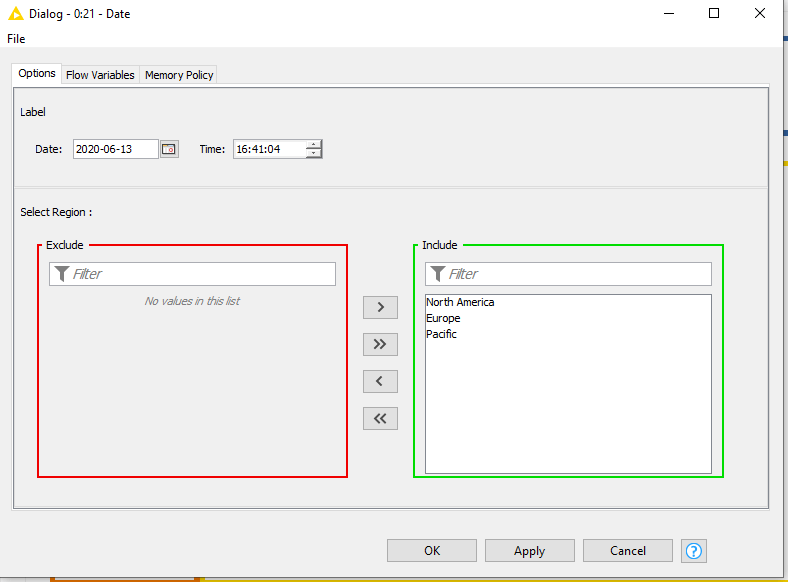
Maintenant, j’installe le node Date&Time Configuration que l’on relie au node Date&Time-based Row Filter. Le node de configuration permet de saisir une date qui sera ensuite disponible dans le flux. Le node suivant accède à cette nouvelle variable et filtre les données an fonction de la date sélectionnée.
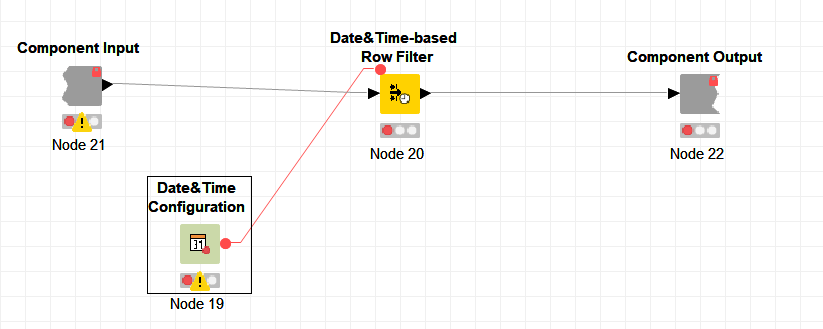
Pour faciliter la lecture du workflow et insérer les informations que l’on souhaite filtrer, nous allons créer un Component, c’est à dire un composant.
- Je sélectionne les deux nodes Date&Time -> clic droit -> Create a component.
- Ouvrir celui-ci, clic droit -> Open
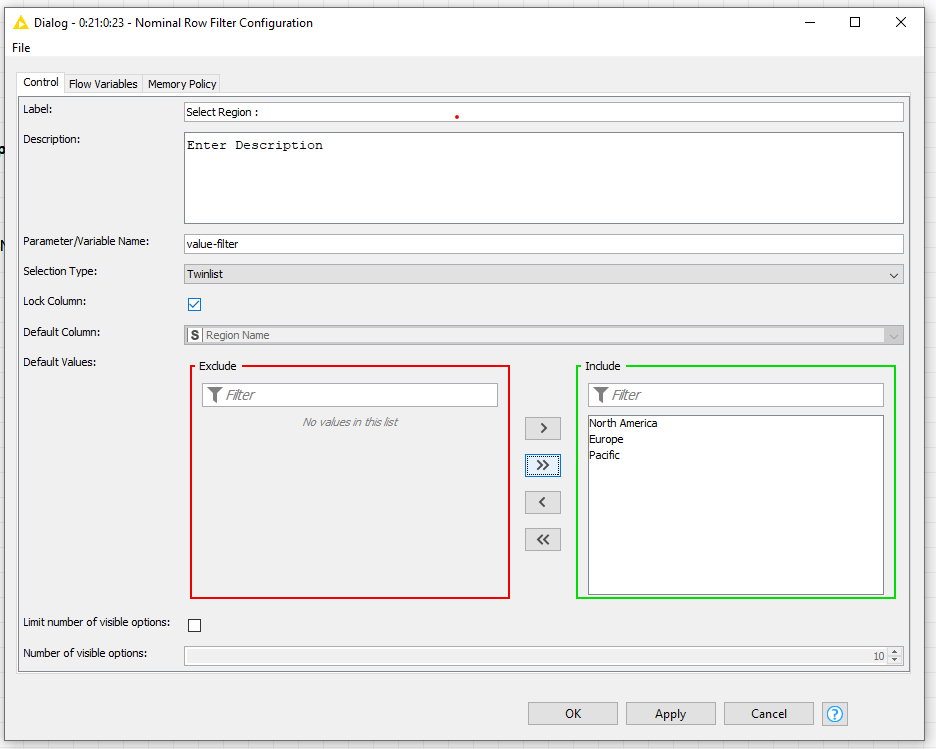
Maintenant, nous allons ajouter un nouveau node de configuration pour que l’utilisateur choisisse une ou plusieurs régions.
Dans le Node Repository choisir Nominal Row filter Configuration, et le glisser sur la ligne derrière Component Output. La ligne doit devenir rouge.
Une fois inséré, nous pouvons ajouter une description afin d’avertir l’utilisateur du rôle de ce filtre. En effet, afin qu’il ne filtre que la colonne Region Name, après sa sélection nous bloquons celle-ci avec Lock Column. Puis nous ajoutons toutes les régions dans Include pour que l’utilisateur puisse avoir le choix des régions.
Enfin, le workflow est prêt, l’utilisateur peut maintenant double-cliquer sur le composant et y insérer ses choix de régions et la date à inclure.
Votre tutoriel se termine ici. Merci de l’avoir suivi ! Prêt pour le prochain ?
Vous avez commencé par le mauvais module ? Pas de panique ! Pour suivre nos autres modules et débuter votre parcours KNIME Beginner, RDV dans notre rubrique Les 3 Minutes Analytiques.
Retrouvez KNIME Rookie et KNIME Jedi avant de devenir un KNIME Expert !
Votre parcours nous intéresse ! Parlez-nous de votre retour d’expérience en commentaires !
Suivez-nous sur les réseaux sociaux : LinkedIn & Twitter !
Author Profile
Latest entries
 Les 3 minutes Analytics5 août 2020Les 3 minutes Analytics – Comment utiliser le node Wait dans KNIME ?
 Les 3 minutes Analytics31 juillet 2020Les 3 minutes Analytics – Comment manipuler un node de configuration dans KNIME ?
 Les 3 minutes Analytics31 juillet 2020Les 3 minutes Analytics – Comment lire une liste de fichiers dans KNIME ?
 Les 3 minutes Analytics30 juillet 2020Les 3 Minutes Analytics : comment pivoter sa table dans KNIME?