
[Tutorial] : how to optimize your dream home hunting with KNIME ?


Home hunting with KNIME : have you ever wondered how to optimize your home hunting ? How to survive a bigger apartment hunting at the age of coronavirus ? Apartment hunting can be a weary business. Wasting too much time on the apartment-search Web sites to find exactly what you want with so many options ? Shorten your time by choosing the right and an intuitive method thanks to KNIME ANALYTICS PLATFORM. The annoucements are coming directly to you !
Home hunting with KNIME : Collect the websites information to optimize your dream home hunting
First, choose a website and hunt your apartment as usual to generate a page of results meeting your requirements. Then, copy the page url.
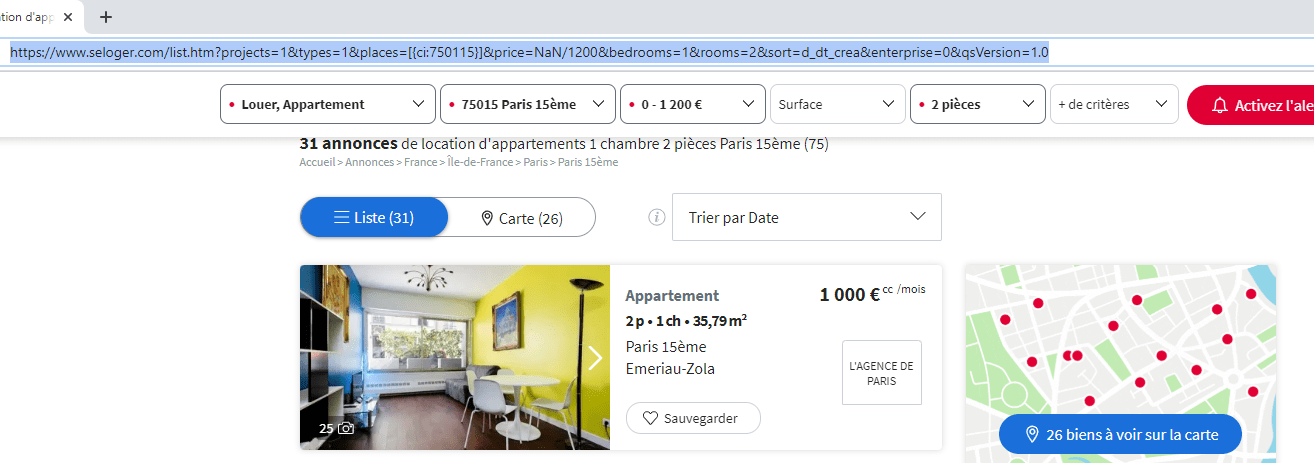
Home hunting with KNIME : Identify the informatiion you wish to keep
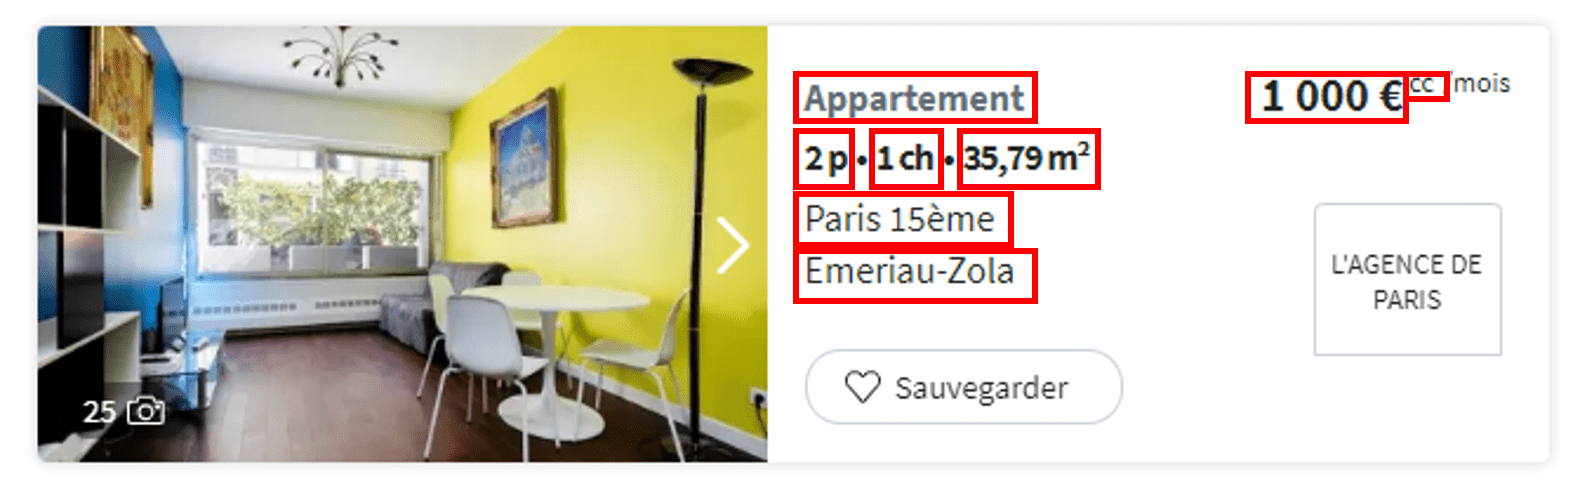
I’ve decided to use the following details : Type of Housing, Number of Bedrooms, Rent, Charges (included or not), Area, Neighbourhood, and Surface Square.
To do so, I need to copy the XPath expressions. With Google Chrome, ion the search results page, right click and select and use « Inspector ». And then CTRL+SHIFT+C, you can notice the part of the related code on your right including a box full of information.
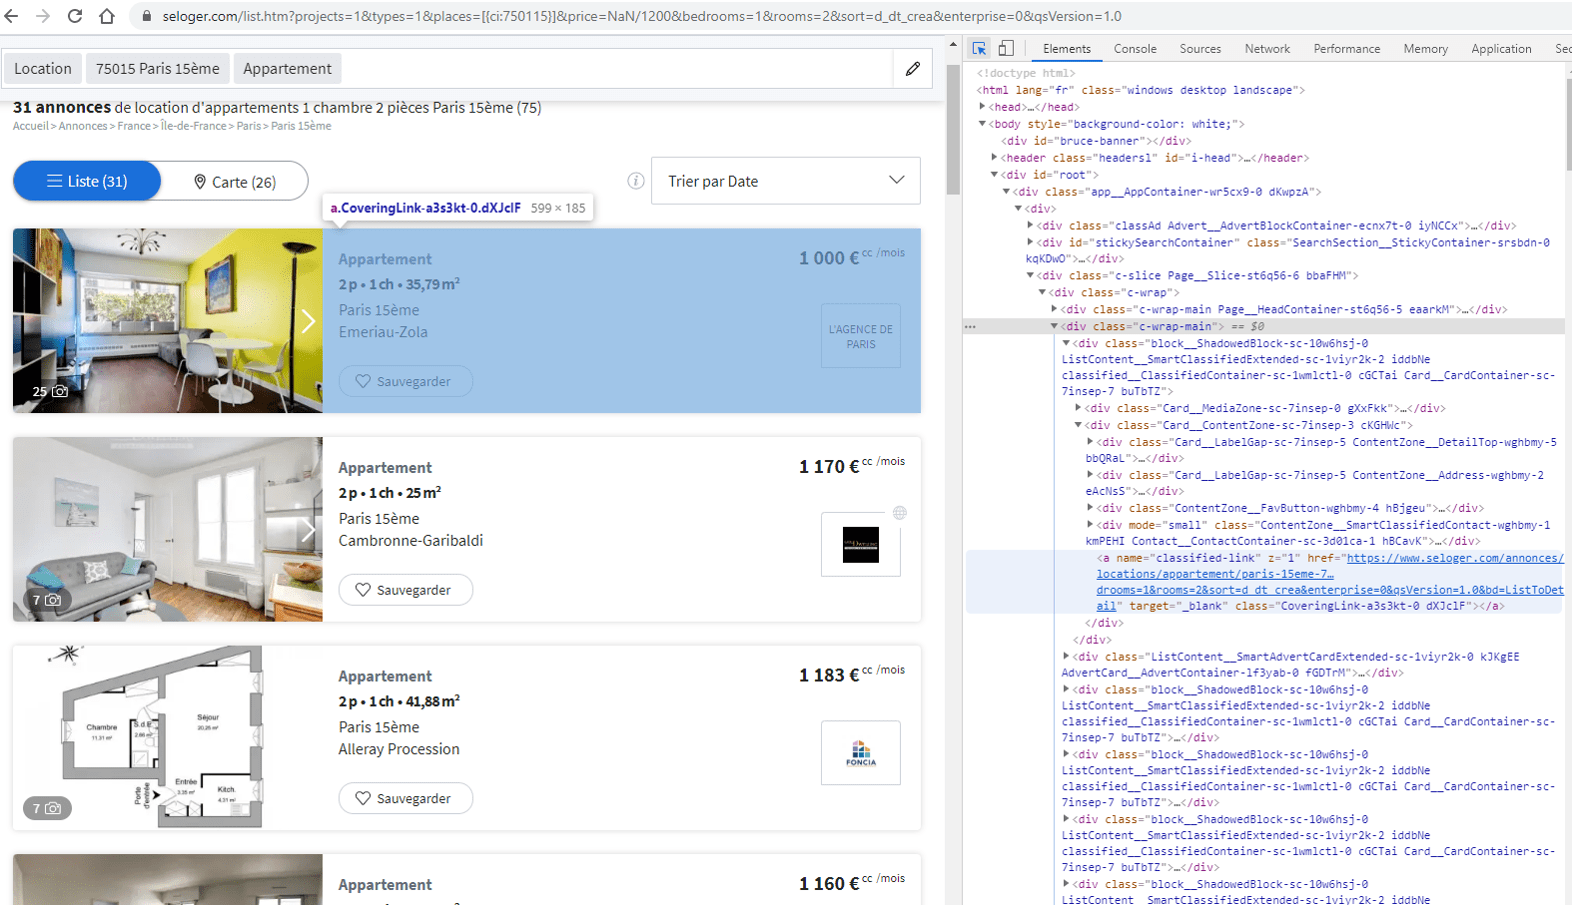
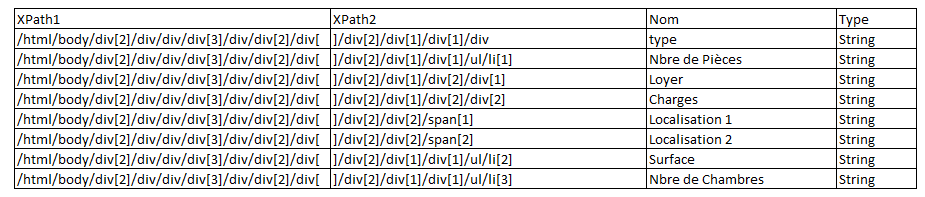
Then, search and find the targeted information by extending the sub-parties in the identified code. Follow with a right-click « Copy », then select « Copy full XPath » et paste in an Excel file. Add a column, the name of the item and the type of data expected (To make it simple, I will select the « String » as a value type).
And here is what an XPath expression looks like : « /html/body/div[2]/div/div/div[3]/div/div[2]/div[1]/div[2]/div[1]/div[1]/div »
The figure in red represents the first ad in the view. Then, don’t forget the following step. An additional step is required in KNIME to vary this figure so you don’t have to repeat this step for all the ads. Start again for all the items. Split the column with the XPath into 2. You should get the following :
Home hunting with KNIME : Create your KNIME workflow
Now you have all the information you need to start building your workflow !
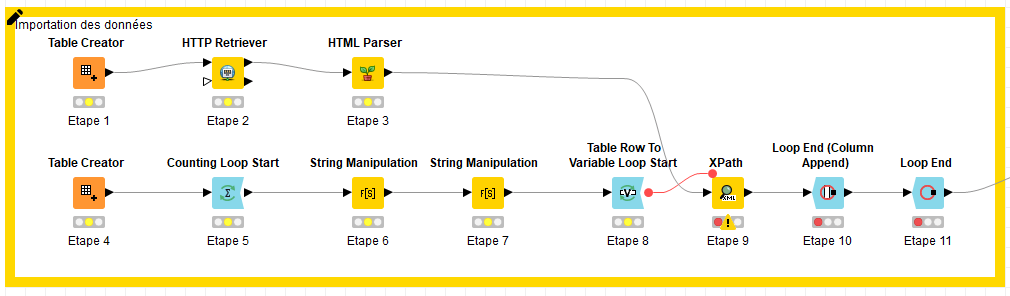
- Create a table with the Table Creator node and insert the url from the search page results in an url column.
For the next steps, we will use the nodes from a KNIME extension you need to install first : Palladian.
- Add the node http Retriever and in the parameters select URL as URL input and apply.
- Then add the HTML Parser node and select Result as Input and apply.
- Next, create a second path in your workflow, in which you will add a new node Table Creator and just paste the data from the excel file including the XPath (Rename the columns !)
- Next step: add the Counting Loop Start node and set, in the dialog box, a number of loops (representing the number of annoucements, here : 35).
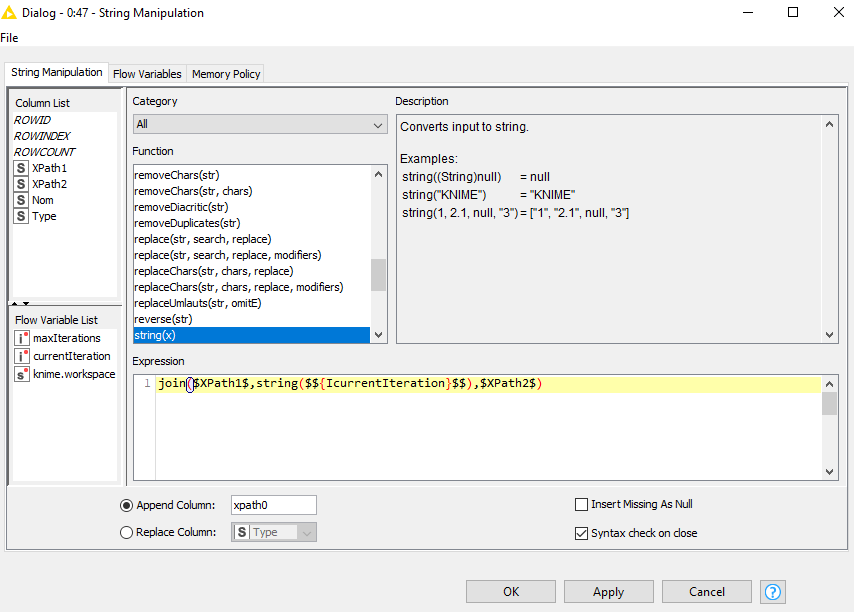
Add a String Manipulation node to concatenate XPath1, the current iteration number and XPath2 in a new XPath0 column as the above :
- Then you need to add another String Manipulation node to replace « / » by « /dns : » (the requested condition for the use of the XPath node in step 9).
- Here, add the Table Row To Variable Loop Start node.
- Then add the XPath node in order to link the two workflow branches. In the same dialog box, click in Settings and add XPath and apply directly without any modification. Go to the tab Flow Variables and decribe the variables Name, XPath0 and Type to newColumn0, xpath0 and returnType0. Apply.
- Then, add this node: Loop End (Column Append).
- And finally, add the Loop End node.
As you can see the results, you can notice additional data even though thay are not really readable. We need to add in the workflow a new part to clean our data.
Home hunting with KNIME : Manage your data
Home hunting with KNIME : Data cleaning
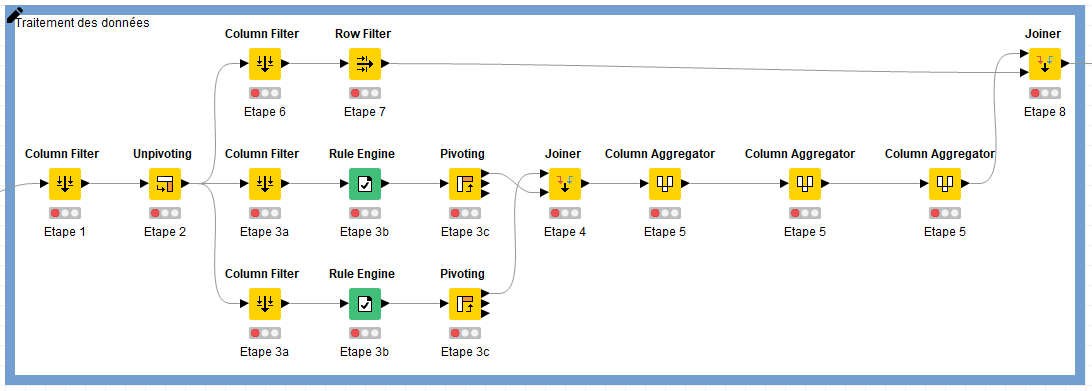
- Start by adding a Column Filter node just to keep the following columns : Type, Number of rooms, Rent, Charges, Area, Neighbourhood, Surface Square, Bedrooms and Iteration.
- Then, add the Unpivoting node and in the dialog box in Value columns, include Iteration. In Retained columns exclude Iteration.
Next to the Unpivoting node, build a parralel branch.
a. Here, add a Column Filter node to keep the ColumnValues and Number of Rooms columns.
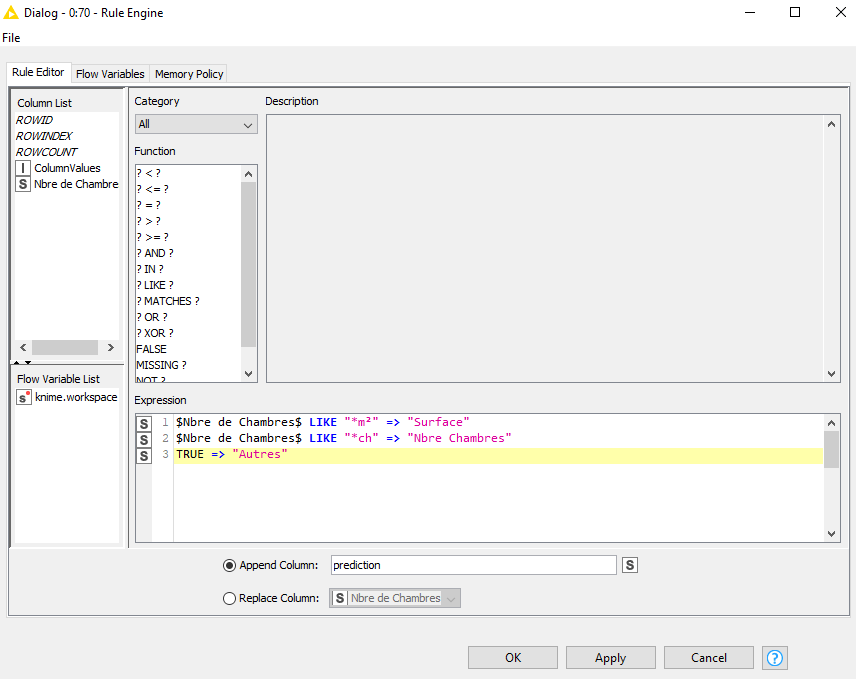
b. And then, add a Rule Engine node in order to categorize your data in a brand new column as follows :
- 3. Add a Pivoting node and now in the dialog box, click in the Groups tab so as to put ColumnValues in the Group column(s) list. Then, in the Pivots tab, just keep the prediction column in the Pivot column(s) list. Lastly, in the Manual Aggregation tab, add the Number of rooms with the First agregation (don’t forget to tick Missing) and apply.
Repeat step 3 replacing the Number of Rooms by Surface Square.
- With the help of a Joiner node create a join between the two branches from step 3. Back to the dialog box, click Joiner Settings and add the joining key to Row ID. Then in the tab Column Selection, keep all the columns, except the ColumnValues and apply.
- Add the Column Aggregator node for concatening the columns including the name Others (from the 2 previous branches).

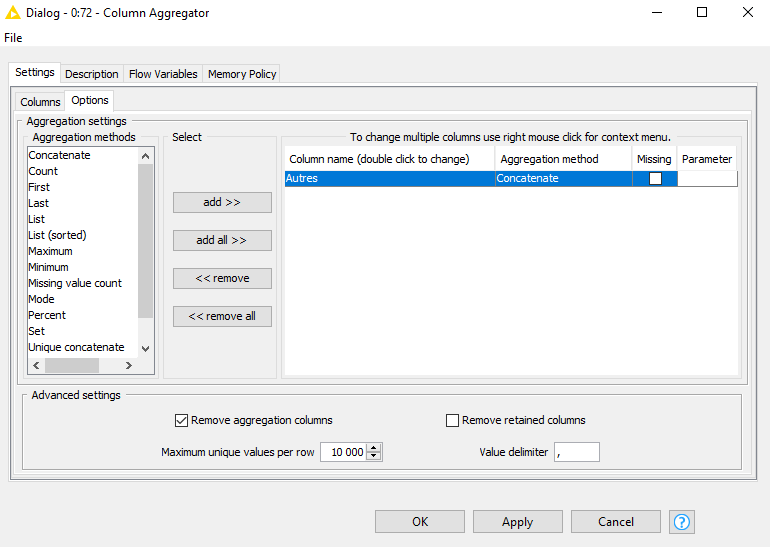
Repeat the sae operation for Surface Square and Number of Rooms.
- In the main branch, next to the Unpivoting node (end of step 2) add a Column Filter node to exclude RowIDs and ColumnNames.
- Add a Row Filter node to exclude the line including the type column is a nil value.
- Here we are, with our two distinct branches in my workflow that I will connect with the Joiner node and the join key RowID. Keep one version of each column and exclude ColumnValues two occurences
Home hunting with KNIME : Data extraction
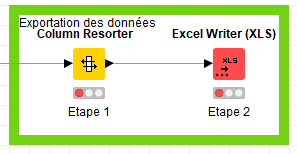
- Add a Column Resorter node to organize the information.
- Add the Excel Writer (XLS) node to generate the final extract.
Home hunting with KNIME : The final data
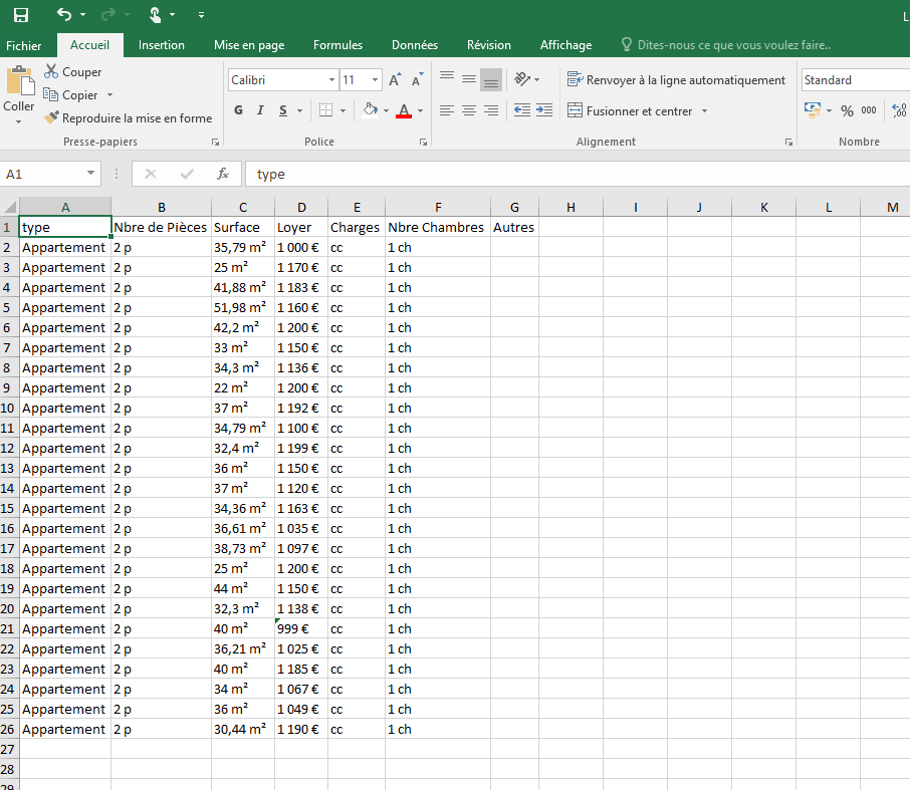
This is the end for your home hunting with KNIME !
Even though House hunting has been revolutionized by the internet, you can now focus on your main options and use the workflow we just built ! And you will get a file including all the annoucements. Enjoy your apartment hunting experience more with KNIME.
This tutorial is also available for any kind of information you wish to extract from Internet. It’s your turn to play, happy hunting !
Want to see KNIME in action ? Don’t miss our upcoming webinar ▶️ HERE !

Author Profile

- Hello ! Passionnée du marketing digital, je travaille quotidiennement avec les différents services de Mydral. Retrouvez dans mes publications du contenu sur le secteur du Big Data, de la BI et de l'IA. Le SEO ou l'e-réputation n'ont pas de secrets pour moi !
Latest entries
 Actualités5 mai 2022Newbie Bootcamp Award : notre concours de la meilleure data visualisation.
 Actualités5 avril 2022Quels enjeux pour l’analyse de vos données hôtelières ?
 Webinars25 mars 2022La maturité des Fintechs avec la data
 Actualités21 mars 2022Livre Blanc : réussir le pilotage des établissements d’enseignement